Summary of project here.
Balloon Adventures Pop-up Card
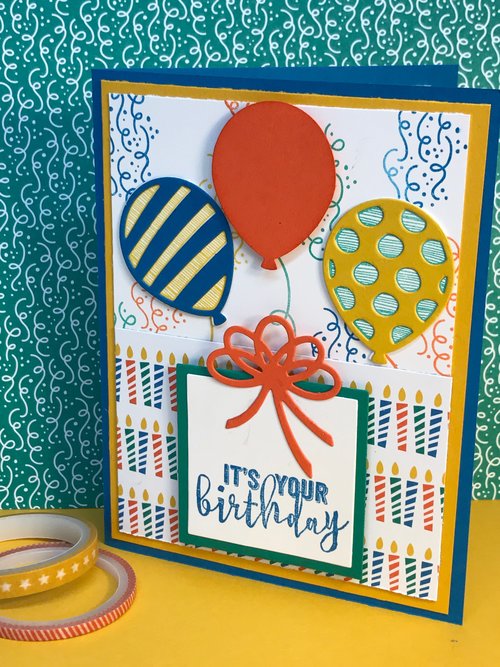
BALLOON ADVENTURES POP UP CARD
Brief description of Project
What You Will Need
Cardstock and Paper
- bullet point
- bullet point
Inks
- bullet point
- bullet point
Tools
- bullet point
- bullet point
Accessories
- bullet point
- bullet point
Tips and Tricks
Placeholder content.
Step by Step Instructions
Cut to 5 1/2 in w x 8 1/2 in h.
Fold in half, use a Bone Folder to reinforce the crease.
Cut your Whisper White CS to 3 3/4 in w x 5 in h.
Stamp the Balloon Strings and Streamers using Classic Stampin' Pads. The colors used here are Pacific Point, Tangerine Tango, Emerald Envy, and Crushed Curry.
Cut desired DSP to 3 3/4 in w x 2 1/2 in h.
If your DSP has a specific orientation, be sure you take that into consideration before cutting.
Stamp balloon striped balloon image and polka dot balloon image on a piece of Whisper White CS using Classic Stampin' Pads. The colors used here are Crushed Curry and Emerald Envy.
Cut a striped balloon image from Pacific Point CS, and the polka dot image from Crushed Curry CS using the Big Shot and the Balloon Pop-Up Thinlits Dies.
Cut the solid balloon image from Tangerine Tango CS using the Balloon Bouquet Punch.
After you have everything cut out, line up the striped images and polka dot images and adhere. (You should now have 3 different balloons for the front of your card).
Use Stampin' Dimensionals on the back of the Tangerine Tango balloon. Use Mini Glue Dots on the back of the layered balloons. Set aside until you are ready to assemble the card.
Using the Layering Squares Framelits Dies and the Big Shot, cut a 2 1/8 in square out of Emerald Envy CS, and a 1 7/8 in square out of Whisper White CS.
Stamp your greeting on Whisper White square using Pacific Point Classic Stampin' Pad.
Cut the large bow image from Tangerine Tango CS using the Balloon Pop-Up Thinlits Dies and the Big Shot.
Adhere the Whisper White square to the Emerald Envy square. Adhere the Tangerine Tango bow to the squares so it looks like a present. Put Stampin' Dimensionals on the back of the present and set aside until you are ready to assemble the card.
Cut Party Animal DSP 2 inw x 5 in h (make sure to pay attention to the orientation of the DSP),
Balloon Adventures Shaker Card
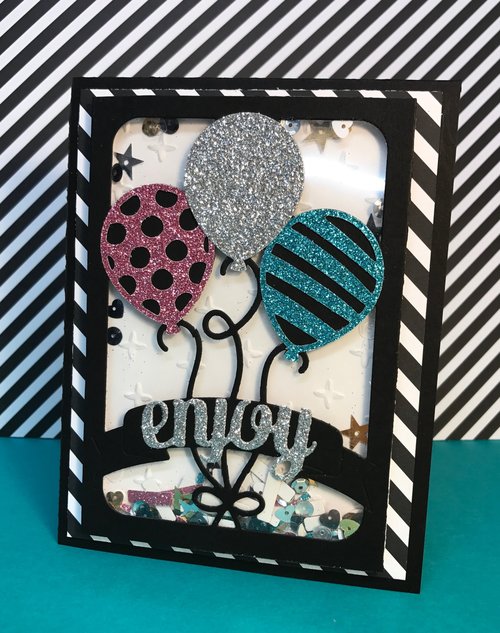
BALLOON ADVENTURES SHAKER CARD
This is a placeholder for this card.
What You Will Need
Paper and Cardstock
- Bullet point
- Bullet point
Inks
- Bullet point
- Bullet point
Tools
- Bullet point
- Bullet point
Accessories
- Bullet point
- Bullet point
Tips and Tricks
This is a placeholder for tips I want people to know.
Step by Step Instructions
Cut a piece of Basic Black 12 x 12 Neutrals DSPS to 4 in w x 5 1/4 in h.
Cut your Basic Black CS to 3 1/2 in w x 5 in h.
Center the Thinlits Die over your Basic Black CS, run through Big Shot to accomplish this look.
Line up and adhere your Window Sheet layer to your cut Basic Black layer. (Make sure you rub your Embossing Buddy over the Window Sheet to keep the static from interfering with the "shaker" contents).
Line the back of this layer with Foam Adhesive Strips. Set this layer aside.
Cut a piece of Whisper White CS to 3 1/2 in w x 5 in h.
Using the Big Shot and the Sparkle TIEF, emboss the Whisper White layer.
Cut a 2 in w x 6 in h piece of the Sweet Sugarplum Glimmer Paper, and the Bermuda Bay Glimmer Paper from the SAB 6 x 6 Glimmer Paper.
Cut a balloon from each color using the striped balloon and the polka dot balloon images from the Balloon Pop Up Thinlits Dies.
Punch a row of candle confetti of each color for your shaker contents using the Candle Border Punch.
Cut a 2 in w x 12 in h piece of Silver Glimmer Paper.
Place your candle confetti and a small handful of the Metallic Sequins Assortment on the inside of the Window Sheet layer.
With the embossed side to the inside of the Window Sheet layer, adhere the sparkle embossed Whisper White CS layer to the Window Sheet layer by removing the backing of the Foam Adhesive Strips.
Set this aside until you are ready to assemble your card.
Punch a large balloon out of the Silver Glimmer Paper using the Balloon Bouquet Punch.
Using the Big Shot and either the Sunshine Wishes Thinlits or the Mini Treat Bag Thinlits, cut a greeting from the Silver Glimmer Paper for the front of the card.
Cut a piece of Whisper White CS to 3 3/4 in w x 7/8 in h.
Stamp partial greeting on it using Bermuda Bay Classic Stampin' Pad.
Cut a piece of Whisper White CS 4 in w x 5 1/4 in h for the inside of the card.
Stamp the inside greeting using Tuxedo Black Memento Pad.
Adhere the partial greeting banner you stamped with Bermuda Bay Classic Stampin' Pad over the same words you stamped in Tuxedo Black Memento Pad.
Adhere to the inside of the card.
Shopping List
Placeholder for Stampin' Up code